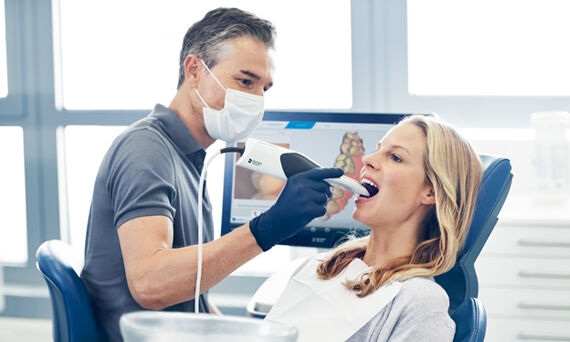
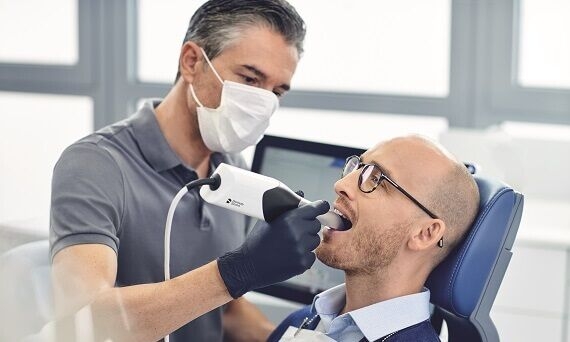
Digital impressions with CEREC Primescan deliver optimum results. The scanner will impress you with outstanding performance as it creates 3D models in photo-realistic and unsurpassed resolution that is immeadiately obvious - to you and your patients.
High level of hygiene
Versatile hygiene options, both for the Acquisition Center and the intraoral scanner. Choose among a variety of three different sleeves – including autoclavable and disposable sleeves
High accuracy
The sensors ensure ultra high resolution and model data density. You can even scan deep cavities and steep inclines
Increased usability
Easy scanning of all dental materials and hard to access areas: The increased field of view visualizes larger areas with less sweeps and immediate precision
Unparalled speed
Intelligent processing inside CEREC Primescan ensures optimum interaction with the software. Complete 3D-scan models are displayed immediately, no matter how fast you scan
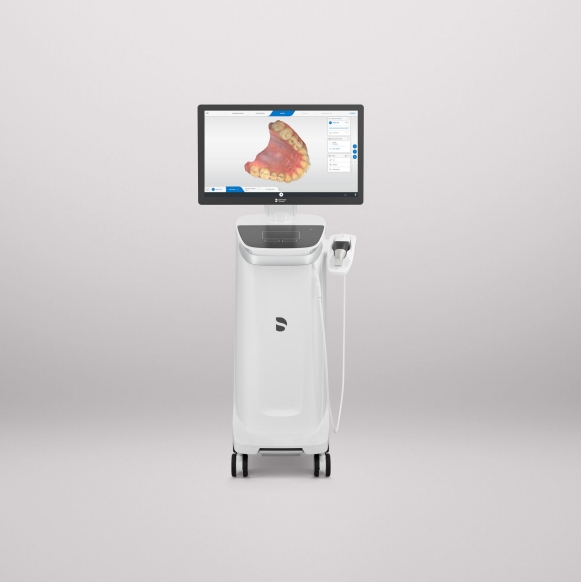
The new acquisition center
Smart features and greater comfort: intuitive use via movable 16:9 touchscreen and touchpad for perfect ergonomics
Prime Collection - Clinical Cases
Watch our collection of clinical cases. Experience how this smart technology can support you in your work to make the treatment experience for your patients better, safer and faster.
With our versatile hygiene options, you can always count on optimal infection control.
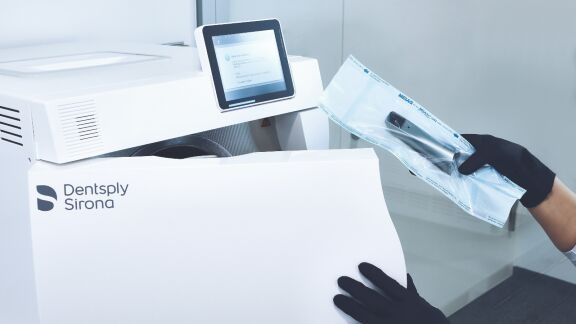
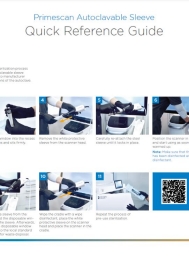
CEREC Primescan - Now available with autoclavable sleeve
How to replace the autoclavable sleeve
The autoclavable sleeve offers higher hygiene standards and more patient safety while keeping the established autoclave sterilization process in the dental practice.
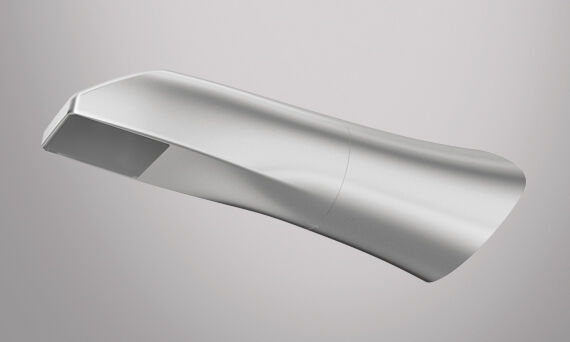
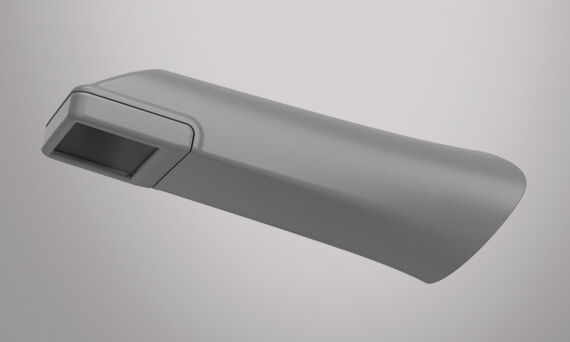
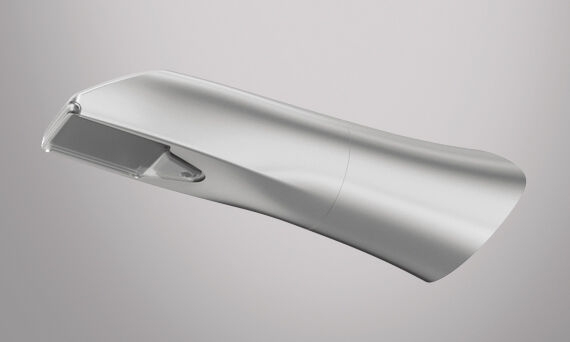
Various hygiene protection sleeves
With three different sleeve options, it has never been so easy and hygienic to take digital impressions. The sleeves all offer the same scan experience. CEREC Primescan has the right option for the fulfillment of your own hygiene needs or any regulatory requirements.
Stainless steel sleeve with sapphire glass window
For multiple use
Extensive reprocessing:
Wipe disinfection
High-level-disinfection
Dry-heat sterilization
Disposable sleeve
For single use
Stainless steel sleeve with disposable window
To allow autoclavability
“The ability to choose from a variety of reprocessing methods with Primescan is an important benefit of the system.”
Tutorial: Primescan - Using and processing the autoclavable sleeve
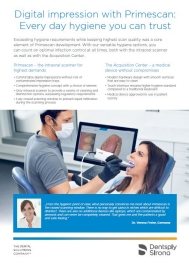
Everyday hygiene you can trust
Exceeding hygiene requirements while keeping highest scan quality was a core element of the Primescan development.
With our versatile hygiene options, you can count on optimal infection control, both with the intraoral scanner as well as with the Acquisition Center.
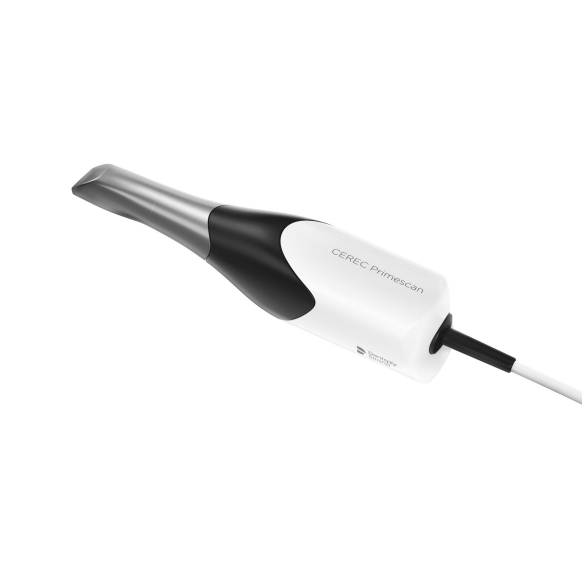
CEREC Primescan – the intraoral scanner for highest demands
Comfortable digital impressions without risk of contaminated impression trays
Comprehensive hygiene concept with a choice of sleeves
Only intraoral scanner to provide a variety of cleaning and disinfection options, exceeding minimum recommended guidelines.
Fully closed scanning window to prevent liquid infiltration during the scanning process
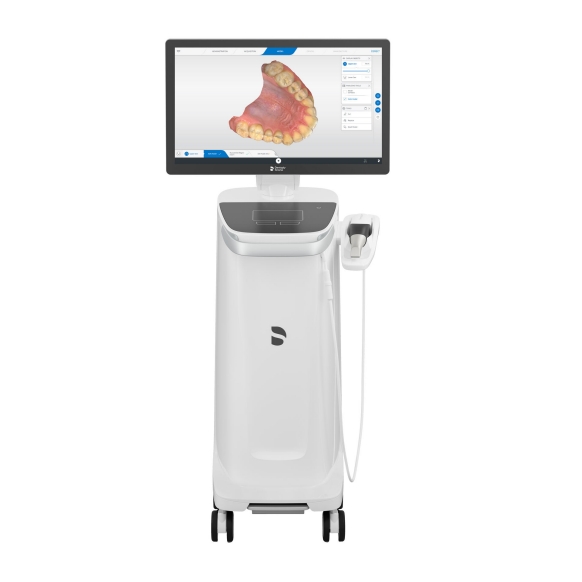
The Acquisition Center – a medical device without compromises
Modern hardware design with smooth and easy-to-clean surfaces
Touch interface ensures higher hygiene standard compared to a traditional keyboard
Medical device approved for use in patient vicinity
“From the hygienic point of view, what personally convinces me most about Primescan is the closed scanning window. There is no way to get saliva into niches which are difficult to disinfect.”
CEREC Primescan Hygiene Flyer
Download our Primescan Hygiene Flyer here to find all information regarding the hygiene concept.
Whatch every step of the CEREC Primescan Hygiene Concept in detail.
Accuracy
Outstanding full-jaw accuracy offers the potential to digitize many more indications in the future.
“Accuracy is what I want. And Primescan is my answer.”
The new CEREC Primescan doesn’t give just one new point of view, but one million:
The innovative Smart Pixel Sensor processes more than 1,000,000 3D points per second, producing photorealistic and highly accurate data. In certain aspects, CEREC Primescan was viewed as the most accurate among the tested intraoral scanners that were compared in an in-vitro study*.
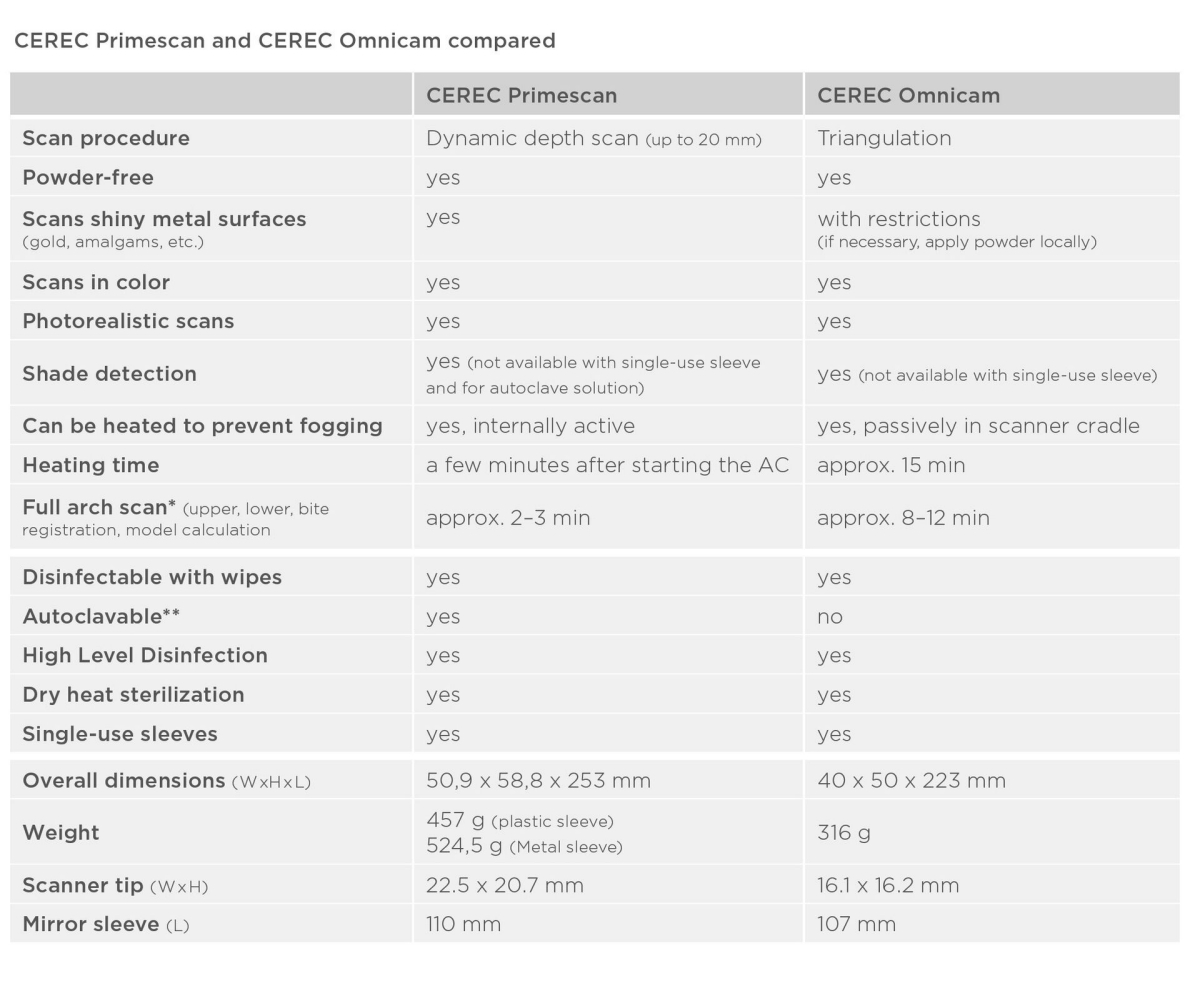
Its dynamic depth scan technology enables perfect sharpness and outstanding precision, even at a measuring depth up to 20 mm – an absolute advantage for deeper-lying indications.
What you see is what you get: Due to CEREC Primescan’s ability to scan at an incredible data density, it delivers complete 3D structures of everything in its field of view – right from the very first scan.
* Ender et al, Accuracy of complete- and partial-arch impressions of actual intraoral scanning systems in-vitro, Int J Comput Dent 2019; 22(1); 11- 19; in the peer group of intraoral scanners, which did not cover several systems commercially available today, Primescan showed the best median and mean values across complete arch, anterior and posterior segments, few statistical limitations apply
Study Overview
This asset provides an overview of the latest studies on the accuracy of CEREC Primescan.
“Prompt results are my ambition. And Primescan is my answer.”
Accelerate the process: CEREC Primescan’s unique technology allows for easy capturing and quicker processing of more data in higher resolution. Intelligent processing in Primescan ensures the optimal interaction with the software by transmitting exactly the data the software needs to proceed. The result: Complete 3D-scan models are displayed immediately, no matter how fast you scan.
Enhance your connectivity: Thanks to seamless, validated and open data transfer options, laboratories and other partners receive high-resolution models in an instant. With CEREC Primescan, you benefit from the freedom to make the best choice of workflows for you and your patients.
Usability
“Usability is my goal. And Primescan is my answer.”
Enjoy the freedom of scanning:
CERE Primescan allows you to start scanning right away. It offers continuously self-heating for fog-free scanning – which means you’re always ready to go. Steep angles? Hard-to-access areas? Shiny materials? An easy job for Primescan.
Thanks to the increased field of view, you’ll be able to visualize larger areas with less sweeps and with immediate precision. The excellent scan results are instantly displayed on the touchscreen of the new Acquisition Center.
Surfaces of the following materials can be captured without coating:
Enamel and dentin, dry, wet, coated with blood
Oral soft tissue
Composite restorative materials
Ceramic restorative materials, polished
Metal such as gold, titanium, amalgam
Primescan Scan Instructions
Primescan Full Jaw Scan
You can use different scanning procedures for scanning a full jaw. It is important to have overlapping data so the sweeps can be stitched. The following procedure is straight forward and easy to learn. Please use it, if you are new to Primescan full jaw scanning.
Use the same Primescan scanning strategy as for Full Jaw Scan but with a splitted
first sweep. It is important to have overlapping data so the sweeps can be stitched.
Please use the following procedure when scanning full jaw edentulous cases for
Atlantis suprastructures.
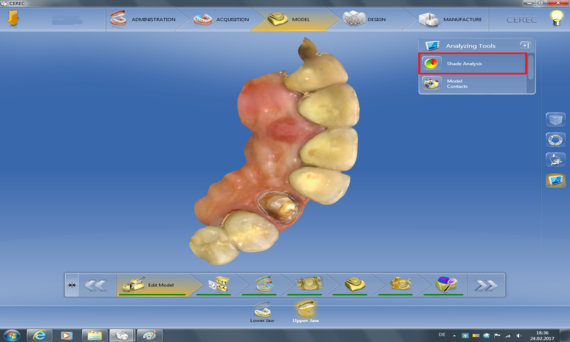
The feature Shade Detection allows you to analyze the shade of any tooth based on the Omnicam scan. This gives you objective support and more certainty when selecting the suitable restoration shade.
You will find the shade analysis in the analysis tools section:
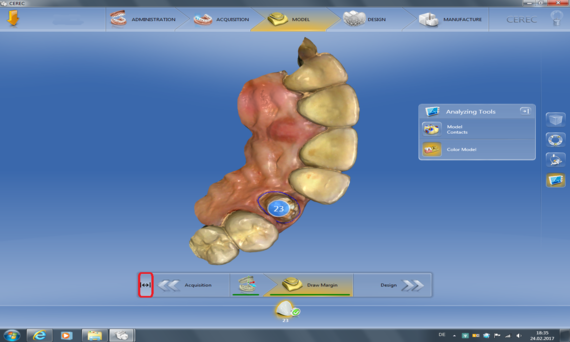
1. When the model is complete on the screen, open the tab on the bottom left to go to the "Edit model" step.
2. Click on "Analyzing tools" and the "Shade Analysis" field to start the feature.
3. Click on the middle of a tooth with the cursor to analyze its shade. Select the radius in a way that the adjacent teeth are not included and that you do not measure too close to the neck or cutting edge of the tooth. Correct shade analysis is not guaranteed in the gray areas of the model due to insufficient scan information.
See what other users say about the feature "Shade Detection".
Activating the feature Shade Detection in the software
If shade analysis is not displayed as an analysis tool, the feature may be deactivated. To activate the feature, open the tab at the top to go to configuration. Select your Omnicam from the list of tools there. Click on "Color identification" to activate the feature. In addition, you can choose here between the VITA Classic and VITA 3D color systems here.
Scanning
For the shade analysis, you need to scan somewhat slower and more precisely than usual because additional information is needed for this feature; i.e. you stay longer on each tooth and vary the distance from the tooth. The gray areas of the model indicate there are insufficient data available for a shade analysis at these sites.
Color calibration
Before the shade analysis can be used, the Omnicam must first be color calibrated. Please note that the color calibration set has a maximum shelf life of only 2 years. You can obtain the color calibration set from your authorized CEREC dealer.
The first generation of the CEREC Omnicam is not suitable for the shade analysis. The serial number for checking this can be read on the camera after removing the mirror sleeve; the number is found at the top on the lens tube. To test whether your camera is suitable, enter this number into "Omnicam check tool."
Check if your camera can be used for Shade Detection
Yes, your Omnicam can be used for Shade Detection from CEREC SW 4.5.
No, unfortunately your Omnicam cannot be used for Shade Detection.
In case you are interested in this feature, there is the possibility of replacing your Omnicam. Please contact your dealer. Nevertheless, you can use all other features of the CEREC SW 4.5.
The serial number you entered could not be found. Please recheck the number.
Necessary to use the feature: Color calibration
Before the feature “Shade Detection” can be used, the Omnicam must be color-calibrated at the beginning. The color calibration kit can be purchased from your authorized CEREC dealer (REF number: 66 30 714). In the adjacent video we show you how to perform the color calibration and then use the color analysis.
Please note that the color calibration set
has a maximum shelf life of only 2 years. The expiration date can be found on the bottom of the color calibration set case. Due to previous storage, it is possible that its shelf life has decreased to less than two years.
can only be used for one year after opening the case. Write the date on which it was opened with a waterresistant pen on the case lid after “Opened on _________” and do not use it again after one year.
After expiration of both periods, the color calibration set should no longer be used.
Calibration Data
The data is only available to CEREC AC users with Omnicam
Unzip the downloaded zip file (example archive.zip) to a stick and copy the two unzipped files (Calibration Data.zip and CalibRegistry.exe) in any directory of CEREC AC with Omnicam of your choice, e.g.: "C:\Sirona" and start the file:"CalibRegistry.exe" by double-clicking it.
Please enter the ID of your calibration set. Then the calibration reference data for the calibration set on your CEREC AC is ready for calibration of your CEREC Omnicam.
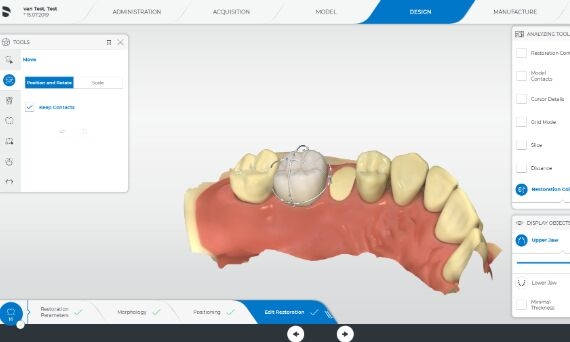
Expanded treatment options thanks to intuitive interfaces
Not least because of the possibility of open scan data export in STL format, our intraoral scanners offer you not only the classic chairside workflow but also various export options for more flexibility in working with your CEREC system.
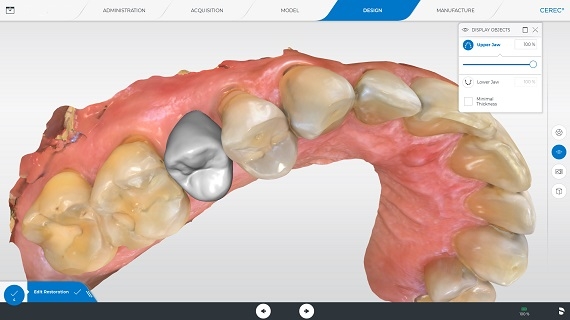
Design with inLab SW, produce with inLab or other CAD/CAM production units and finalize.
Your trusted lab technician is directly connected to your CEREC system via the the Connect Case Center Internet portal. This spares your patients the discomfort of conventional impressions, even for indications you do not plan on treating in one visit. The Connect Software provides you with everything you need to send impression data, and it comes pre-installed on your CEREC system. Sending data via Connect is, of course, free of charge.
It does not always have to be the finished restoration that leaves the laboratory. With the digital Design Service, laboratories can receive the intraoral data set via the Connect Case Center Inbox, design the desired work with the inLab software and send the design data set back to the CEREC practice for finalizing. A digital service that can save valuable treatment time in the practice and reward dental know-how.
2) External production with the involvement of your dental lab
Scan with Primescan or Omnicam
Data transfer via Connect Case Center Portal
Design with inLab Software
STL export
Unlimited further processing
3) Open Scan Export
Scan with Omnicam
STL export
Unlimited further processing
4) CEREC Ortho Workflow
Scan with Primescan or Omnicam
Data export with CEREC Ortho Software
Clear aligners as SureSmile® aligners
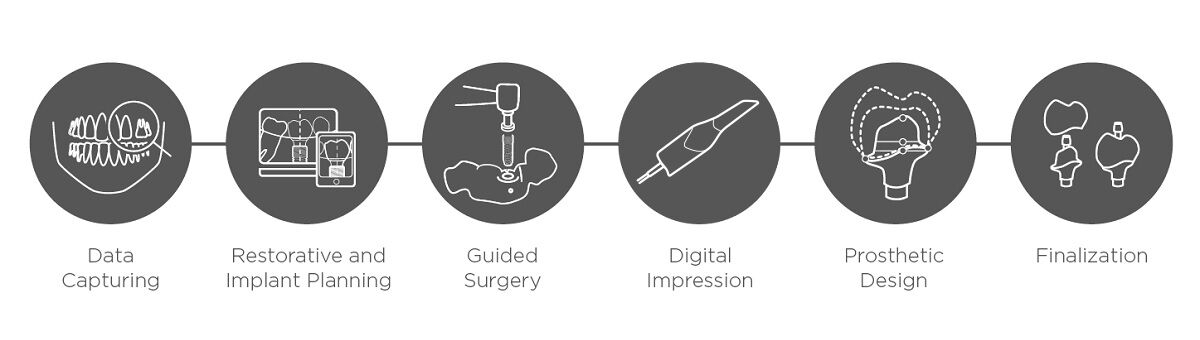
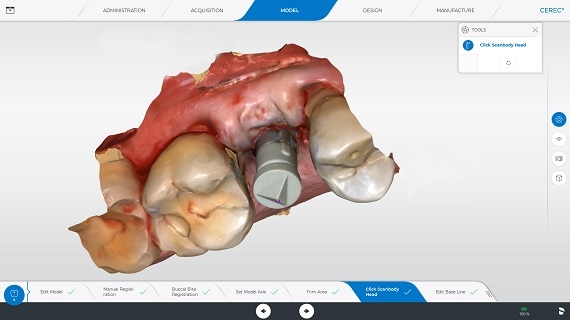
5) The Digital Implant Workflow
1. Data Capturing
Optically scan the situation with CEREC Primescan or Omnicam, design the crown, and import the prosthetic proposal into the GALILEOS Implant software.
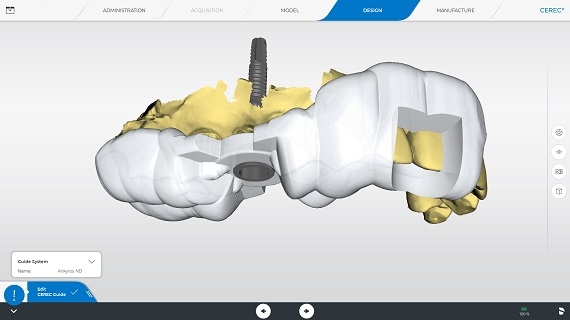
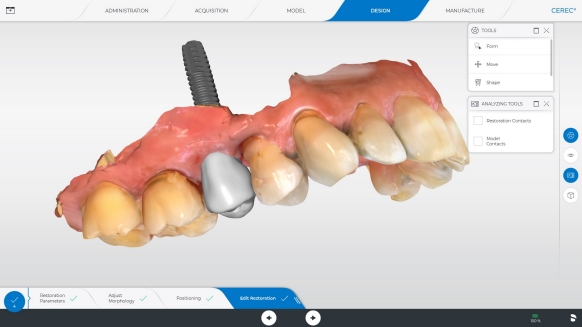
2. Restorative and Implant Planning
Plan the implant in the GALILEOS Implant software based on prosthetic data and a 3D X-ray image. Finally, import the planning data into the CEREC software. Create a surgical guide with a depth stop tailored to the selected implant and position for a precise fit.
3. Guided Surgery
The implant is securely and easily placed in a minimally invasive procedure using a surgical guide.
4. Digital Impression
The virtual 3D model is calculated based on the intraoral scan of the scanbody, the adjacent teeth and scan of the scanbody. Taking all this information into account, the software automatically recognizes the three-dimensional position of the implant.
5. Prosthetic Design
Use the CEREC software to plan the abutment and crown or screw-retained crown in few steps.
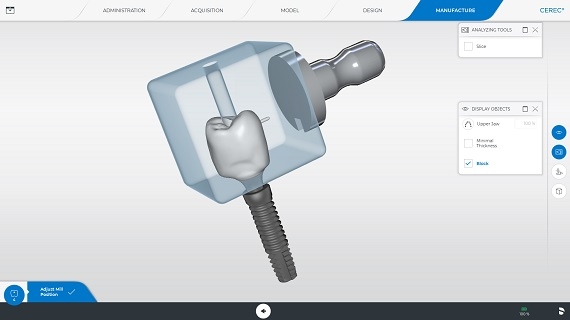
6. Finalization
Immediately produce your temporary or final restoration with CEREC Primemill or CEREC MC X and insert it precisely in your own practice.
CEREC Network
Operation Recommendations
For your CEREC network, please consider this information:
As the CEREC Primemill’s firmware updates are typically much larger than those for the MC XL units, completing these updates with a radio module takes considerably longer than with a WiFi solution. CEREC Primemill also offers additional features such as remote login which require a connection to the practice (or lab) network.
Dentsply Sirona recommends that CEREC Primemill as well as our other manufacturing devices (e.g. CEREC MC/MC X/MC XL, inLab MC X5, CEREC SpeedFire) and Hub are connected via an ethernet LAN cable to the practice network.
For example, the practice’s manufacturing devices and Hub can be connected to a switch which is in turn connected to the practice router. Primescan AC / Omnicam AC is connected to the network via WiFi that is provided by single WiFi-Access points per operatory. Those are connected via ethernet (LAN) cable to the router using one SSID and act as a Mesh Network.
Note: PowerLan/Powerline Communication (PLC) connections are not recommended!
In case the given infrastructure does not provide ethernet cabling and sockets at the point of operation of the manufacturing devices, it is recommended to set up a TriBand-Mesh Network with satellites that provide ethernet ports. Such systems include Netgear’s Orbi System, UniFi or TP-Link.
Please find all details in the new document CEREC Network Operation Recommendations. This document covers all CEREC network-based components.
Frequently asked questions on our Intraoral scanners
Technical details Primescan
Within CEREC SW, Primescan models can be used for all indications supported by Omnicam. Models created and exported can be used for any CAD/CAM dental application, including dental surgery and orthodontics.
Primescan’s outstanding full-jaw accuracy offers the potential to digitize future indications that today can only be treated conventionally.
Surfaces of the following materials can be captured without coating:
• Enamel and dentin, dry, wet, and coated with blood.
• Oral soft tissue.
• Composite restorative materials.
• Ceramic restorative materials (polished, see limitations below).
• Metal such as gold, titanium and amalgam(see limitations below).
Powdering the teeth does not have a significant effect on scan performance.
Fully translucent materials, e.g. glass may require coating prior to capturing. The recommended coating agent in these cases is CEREC Optispray. A layer of minimum thickness is sufficient.
Both products feature identical hardware. Pre-installed software and licenses differ, with the CEREC SW only being installed on CEREC Primescan units.
Every Primescan AC can be upgraded to a CEREC Primescan AC.
Yes, the Connect SW 5.x is included in every acquisition unit with delivery as well as one Inbox license. This enables a smooth workflow between the dentist and his or her laboratory.
The innovative Smart Pixel Sensor processes more than 1,000,000 3D points per second, producing photorealistic and highly accurate data.
In certain aspects, Primescan was viewed as the most accurate among the tested intraoral scanners that were compared in an in-vitro study.* Its dynamic depth scan technology enables perfect sharpness and outstanding precision, even at a measuring depth up to 20 mm – an absolute advantage for deeper-lying indications.
*Ender et al, Accuracy of complete- and partial-arch impressions of actual intraoral scanning systems in-vitro, Int J Comput Dent 2019; 22(1); 11- 19; in the peer group of intraoral scanners, which did not cover several systems commercially available today, Primescan showed the best median and mean values across complete arch, anterior and posterior segments, few statistical limitations apply
Acquisition Center (AC)
Both for its touchpad and its monitor touchscreen, all Windows 10 gestures are supported.
Battery running time (during operation, i.e. scan): More than 60 minutes
Battery standby time: Up to 4 hours
The acquisition unit is equipped with a touch monitor that includes an on-screen keyboard, which is opened automatically when needed.
Software & Interfaces
Yes, the data can be used in the inLab software.
Yes. CEREC SW 5 has the same compatibility as the previous version.
No, this is not possible.
Yes, it is possible to operate two CEREC scanners (even CEREC Primescan and CEREC Omnicam) with one milling unit, e.g., via a wireless connection.
Yes. Primescan AC can be upgraded to a chairside unit by just purchasing CEREC SW 5. As soon as you have CEREC SW 5, you can work with a CEREC milling unit and CEREC SpeedFire.
Yes, data can be exported via STL or to 3rd party CAD software at any lab using Inbox via the Connect Case Center.
If there is no CEREC SW installed, it’s not possible to design at all. If CEREC SW has been installed without licenses, it can be used in demo mode to design restorations, but these cannot be exported or manufactured.
Only with a CEREC SW license can restorations be designed and produced.
Yes, by exporting the data as an STL file, models can be printed with all common 3D printers.
Yes, STL export of scan data is already included in the CEREC Software, Connect Software and CEREC Ortho Software. No additional license is necessary.
All our scanners come with an Inbox license to enable a smooth workflow to all labs. Therefore, we are as open as possible. However, we also provide a large number of seamless workflows and workflows with validated partners.
The Connect Case Center Inbox is a software application that allows receiving cases through the Connect Case Center and importing them into any lab software.
Each CEREC Primescan AC and Primescan AC is delivered with a free-of-charge license voucher which you can give to a laboratory of your choice. Additional licenses can be ordered.
FAQs: Frequently Asked Question on CEREC Omnicam
A CEREC Omnicam, which is suitable for shade analysis
(you can check this with the Omnicam Check Tool, which can be found within the topic "Shade Detection" on this page)
A color calibration set (REF number: 66 30 714)
Software version:
CEREC Software 4.5.0 or later
CEREC Premium Software 4.5.0 or later
Your question was not answered?
Our customer service center will be pleased to assist you. In order to do so, please fill in our contact form.